
A healthy Monstera can grow quickly, but without support its stems may lean, spread across the room or pull the plant out of balance. A moss pole provides a vertical surface that helps a climbing plant grow in a more organised direction while giving its aerial roots a textured material to contact.

In nature, Monstera produces roots from its stems and uses them to attach to trees as it climbs. Indoors, a moss-covered support can recreate part of that climbing structure.
This guide explains how to make a moss pole from sphagnum moss and coated mesh, how to install it without damaging the root system and how to keep it functional after the plant begins climbing.
DIY moss pole in five steps
- Hydrate sphagnum moss and squeeze out excess water.
- Roll coated mesh into a narrow cylinder around a rigid support.
- Fill the cylinder loosely with damp moss.
- Anchor the pole securely behind the plant.
- Attach the main stem with soft ties and keep the moss lightly moist.
The finished pole should be stable, breathable and damp rather than permanently saturated.

Why climbing plants benefit from support
A moss pole does not create mature leaves by itself. Light, plant maturity, genetics, nutrition and healthy roots still matter. The pole gives the plant a direction in which to climb and provides a surface its aerial roots may attach to.
A suitable climbing houseplant support can also:
- keep long stems more compact,
- reduce pressure on individual stems,
- make the plant easier to position,
- help aerial roots grow toward a consistent surface,
- create a more natural upright form.
RHS cultivation guidance specifically recommends a moss pole or another support when growing climbing Monstera indoors.


Which plants can use a moss pole?
A filled moss pole is particularly useful for:
- Monstera deliciosa,
- Monstera adansonii,
- climbing Philodendrons,
- Epipremnum or Pothos,
- Rhaphidophora tetrasperma,
- Scindapsus,
- many Syngoniums.
Some plants use support more readily than others. A trellis, plank or coir pole may be sufficient when the goal is only to hold stems upright. A damp sphagnum moss pole is more suitable when the grower wants aerial roots to enter the support.
Moss pole, coir pole, plank or trellis?
| Support | Root attachment | Maintenance | Best use |
|---|---|---|---|
| Filled sphagnum moss pole | High potential when kept moist | Highest | Monstera and climbing aroids |
| Coir-wrapped pole | Limited moisture and root penetration | Low | Basic vertical support |
| Wooden plank | Good surface contact but no internal moisture | Low | Shingling or strongly climbing plants |
| Metal or bamboo trellis | No rooting medium | Very low | Decorative stem support |
| Plain bamboo cane | Minimal | Very low | Temporary support for a young plant |
Choose a filled moss pole when root attachment is part of the project. Choose a dry support when regular moss watering would not fit the plant-care routine.
Materials for a DIY moss pole
For one medium-sized pole, prepare:
- dried sphagnum moss,
- plastic-coated or stainless steel mesh,
- a bamboo cane, rigid plastic tube or strong coated stake,
- UV-resistant cable ties,
- soft plant ties or hook-and-loop plant tape,
- wire cutters,
- protective gloves,
- a bowl of water,
- a nursery pot with drainage holes,
- an airy substrate suitable for the plant.
PlantNest Sphagnum Moss is intended for uses including moss poles, propagation and moisture-balanced custom substrates. PlantNest also offers Aroid and Monstera & Philodendron mixes suitable for repotting climbing tropical plants during installation.
Recommended moss pole dimensions
For a small to medium Monstera:
- finished moss section diameter: approximately 5–8 cm,
- anchor length inside the pot: approximately 20–30 cm,
- pole above the plant: at least 25–40 cm of spare climbing space.
A large mature Monstera requires a thicker pole, stronger central support and heavier pot.
A useful planning formula is:
current plant height + future climbing space + anchor length
Keep the moss-filled section above the substrate surface. The lower anchor can be a bare stake or tube. Burying a large mass of sphagnum inside the pot may keep that section wetter than intended.
Step 1: Identify the front and back of the plant
Before cutting any material, examine the Monstera.
The leaves generally face away from the climbing surface. Aerial roots emerge from the stem and grow toward the surface the plant would use for support.
Position the moss pole behind the side where the aerial roots naturally emerge. Placing it on the wrong side forces the stems and leaf petioles into an unnatural position.
When the plant has grown in several directions, select the main stem and orient the strongest nodes toward the pole. Do not force old rigid stems to bend sharply.
Step 2: Measure and cut the mesh
Decide how tall and wide the pole should be. Cut a rectangle of mesh long enough to create the desired moss section.
For a pole around 6 cm in diameter, a mesh width of roughly 20–25 cm is usually manageable, depending on how much overlap is used.
Wear gloves because freshly cut mesh can have sharp edges. Bend exposed ends inward so they cannot scratch leaves, hands or furniture.
Step 3: Rehydrate the sphagnum moss
Place only the amount of moss needed for the project into a clean bowl. Add water and allow the fibres to soften fully.
Lift the moss and squeeze out the excess. It should feel evenly damp but should not release water when held normally.
PlantNest’s storage guidance recommends rehydrating only the required amount and preparing moss for poles so that it is moist rather than dripping. Permanently soaked sphagnum can lose airflow and develop odour or mould.
Step 4: Form the mesh cylinder
Roll the mesh into a cylinder with a small overlap along the edge.
Secure one end and the centre with cable ties, but leave enough of the cylinder open to add the moss. Check the diameter before tightening everything permanently.
A narrower pole uses less moss and dries more quickly. A very wide pole holds more moisture but becomes heavier and may be difficult to fit into a small pot.
Step 5: Add a rigid central support
Place a bamboo cane, plastic tube or strong stake along the back of the mesh cylinder.
The rigid support should extend below the moss section by 20–30 cm. This bare lower section will anchor the pole inside the pot.
Attach the mesh to the support in several places. The pole should not twist around the stake when light pressure is applied.
For a large plant, two parallel stakes or a thicker rigid tube may be necessary.
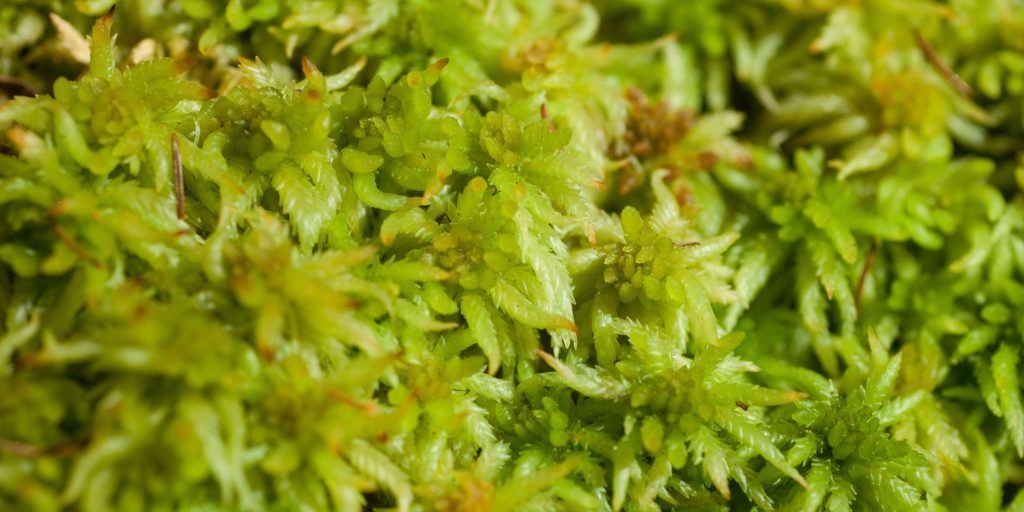


Step 6: Fill the pole with sphagnum moss
Add the damp moss a little at a time.
Distribute it evenly and fill visible gaps, but do not compress it into a solid block. Loose moss retains moisture while preserving the air spaces that aerial roots need.
Rotate the pole as you work so one side does not become denser than the other.
Continue until the moss reaches the top of the mesh section. Close the remaining edge with cable ties and trim their ends.
Step 7: Test the finished pole
Before placing it in the pot, check three things:
- The mesh has no dangerous exposed edges.
- The central support does not move independently of the cylinder.
- The moss remains in place when the pole is held upright.
The finished pole should feel firm but not excessively heavy.
Step 8: Prepare the plant and pot
Installing a pole is easiest during repotting because the position of the support can be planned around the root ball.
Choose a nursery pot with drainage holes. A new pot generally needs to be only slightly wider than the current root system. A large volume of unused wet substrate can make watering harder to control.
PlantNest’s repotting guide recommends moving to a pot approximately 2–4 cm wider than the existing container and selecting a substrate suited to the plant’s root requirements.
Remove the plant gently. Do not strip all old substrate from healthy roots merely because a pole is being installed.
Step 9: Anchor the moss pole
Place the bare lower stake close to the back wall of the nursery pot.
The pole should touch the rear side of the root ball without crushing major roots. Hold it vertically while adding fresh substrate around the root system and anchor.
Gently tap the pot to settle the mix. Do not press it into a dense mass.
Test stability before attaching the plant. A pole that moves inside an empty-looking pot will become less stable as the plant gains height and weight.
Step 10: Position the plant against the pole
Place the main stem against the moss so that nodes and aerial roots face the support.
Aerial roots that are already flexible can be guided gently toward the moss. Do not sharply bend dry, woody or brittle roots. They may split.
The plant should remain at approximately the same planting depth as before. Do not bury the stem deeply simply to make it reach the support.
Step 11: Attach the stems correctly
Use soft ties around the main stem and pole.
Place each tie:
- below or between nodes,
- loosely enough to allow stem expansion,
- far enough from new growth that it cannot trap an emerging leaf.
Never tie a leaf petiole tightly to the pole. Petioles need to move as leaves orient toward the light. Tying them can deform the plant or damage new growth.
Two or three ties are usually enough for a medium plant. The ties support the stem while aerial roots begin making contact.
Step 12: Water the substrate and pole separately
Water the potting mix thoroughly and allow excess water to leave through the drainage holes.
Then moisten the moss pole slowly from the top. A squeeze bottle or narrow-spout watering bottle provides better control than pouring a large amount at once.
Stop when the moss is evenly damp. Water should not continually stream from the pole into an already saturated pot.
How to keep a sphagnum moss pole moist
The ideal schedule depends on:
- pole diameter,
- room humidity,
- temperature,
- airflow,
- the amount of moss,
- how many roots have entered the pole.
Check by touch rather than watering on a fixed weekday. When the outer moss feels dry and the pole becomes noticeably lighter, rehydrate it slowly from the top.
In a dry heated room, the pole may need attention every few days. In a humid room, it may stay damp much longer.
A moss pole should not remain permanently soaked. Moisture must be balanced with airflow to reduce stale odours, mould and unhealthy root conditions.
An easy DIY moss-pole watering bottle
A reusable bottle can make controlled watering easier.
- Use a clean squeeze bottle with a narrow nozzle.
- Fill it with room-temperature water.
- Insert the nozzle just inside the top of the moss pole.
- Apply water gradually in several small rounds.
- Pause between rounds to allow the moss to absorb it.
Avoid leaving an open reservoir permanently attached unless the flow rate has been tested carefully. A continuously dripping bottle can saturate the pole and pot.
The best substrate for a Monstera with a moss pole
The potting substrate must remain airy even though the moss pole is regularly moistened.
A dense mix and a wet pole can keep the centre of the pot damp for too long. Use a structured aroid mix containing components such as bark, perlite, pumice or zeolite.
PlantNest Monstera & Philodendron Soil Mix combines universal substrate, pine bark, perlite, pumice and zeolite. The more general Aroid Soil Mix combines universal substrate, bark, perlite, expanded clay and zeolite.
Product callout for the published article
Build the support and improve the root zone at the same time. Pair PlantNest Sphagnum Moss with Monstera & Philodendron Soil Mix or Aroid Soil Mix when installing your new pole.
PlantNest also offers a Monstera & Philodendron Growing Kit that combines a specialised substrate with expanded clay.
How to encourage aerial roots to attach
Keep the correct side against the pole
Nodes and aerial roots need direct access to the moss. A gap between the stem and pole makes attachment less likely.
Keep the moss lightly moist
Dry sphagnum still provides texture, but roots are less likely to grow deeply into it. Keep it damp without turning it into a constantly wet reservoir.
Provide adequate light
A pole cannot compensate for very low light. A climbing plant needs enough energy to produce active stems, leaves and roots.
Keep the setup stable
Frequent movement breaks contact between young roots and the moss. Once the plant has been positioned successfully, avoid repeatedly removing and retying it.
Be patient
Old aerial roots may not change direction easily. New roots produced close to the pole often make contact more naturally.
Common DIY moss pole mistakes
1. Making the pole too short
A pole that ends at the current top leaf offers no room for growth. Include at least 25–40 cm of spare height or build a modular pole that can be extended.
2. Using an unstable anchor
The mesh cylinder is not enough to hold a large plant. Include a rigid central support and bury a sufficient bare section inside the pot.
3. Filling the pole too tightly
Compressed moss loses the open structure that makes it useful. Fill gaps, but keep the fibres springy.
4. Leaving sharp wire exposed
Cut mesh can damage leaves and hands. Bend the edges inward and inspect every cut point.
5. Positioning the pole on the front of the plant
The aerial-root side should face the pole. Placing the support in front can twist the stems and hide the leaves.
6. Tying leaf petioles
Only the main climbing stem should be secured. Leaves need freedom to reposition themselves.
7. Oversizing the pot
A much larger pot holds more wet substrate than a small root system can use. Stability should come from the anchor and suitable pot weight, not from excessive pot size.
8. Watering the pole and pot as one system
The substrate may still be moist when the pole has dried. Check them separately and water each according to its condition.
9. Expecting instant larger leaves
Support can help the plant develop a more organised climbing form, but leaf size and fenestration also depend on light, age, plant health and genetics.
10. Letting the plant grow beyond the pole
Once the stem extends far above the support, it may bend and become difficult to reposition. Extend the pole before the unsupported section becomes long and rigid.
How to extend a moss pole
A modular extension can be added without removing the original pole.
- Build a second, shorter mesh cylinder with the same diameter.
- Leave several centimetres of its lower mesh section free of moss.
- Slide that section over or behind the top of the existing pole.
- Overlap the two rigid supports.
- Secure both mesh and supports with several cable ties.
- Fill any visible gap with damp sphagnum.
Test the connection by moving the upper section gently. It should not wobble independently.
Add the extension before the plant reaches the top so new aerial roots can continue into the fresh moss without interruption.
How to replace an old moss pole
When roots have entered the moss, do not pull the pole away from the plant.
Instead:
- Remove the plant and pole from the pot together.
- Cut cable ties and mesh carefully.
- Open the cylinder in sections.
- Leave moss attached to roots that would be damaged by removal.
- Transfer the plant to a new support with minimal root disturbance.
A pole with extensive living roots has effectively become part of the plant’s root system.
Is a moss pole always necessary?
No. A Monstera can survive without one.
A moss pole is most useful when the aim is upright climbing growth and close aerial-root contact. A trellis or stake is sufficient when the main goal is simply to prevent the plant from leaning.
The best support is one that can be maintained consistently. A permanently dry moss pole may still work as a physical support, but it offers little advantage over a coir pole or textured plank.
Frequently asked questions
How tall should a moss pole for Monstera be?
The moss section should extend at least 25–40 cm above the highest supported node. Add another 20–30 cm of bare support below the moss for anchoring inside the pot.
Can a moss pole be added without repotting?
It is possible when there is space beside the root ball, but pushing a large stake blindly into a full pot can damage roots. Installation during repotting gives better control over placement.
Can coco coir replace sphagnum moss?
Coir can create a textured support and needs less frequent maintenance, but a wrapped coir pole does not usually offer the same moist internal rooting medium as a filled sphagnum pole.
Does a moss pole have to stay wet?
It should stay lightly and evenly moist when the goal is aerial-root attachment. It should not remain saturated or drip continuously into the pot.
Why are the aerial roots not entering the pole?
The pole may be on the wrong side, too dry or too far from the nodes. The plant may also be adapting to the new position. Guide flexible new roots toward the moss and keep the stem in stable contact.
Can Pothos grow on a moss pole?
Yes. Epipremnum or Pothos can be trained onto a damp moss pole. Attach the vine so its nodes contact the moss.
Can I use ordinary forest moss?
Collected moss may introduce insects, contaminants or protected material into the home. Clean horticultural sphagnum provides more predictable structure and storage.
What is the best potting mix for a moss-pole Monstera?
Use an airy, structured aroid mix with bark and mineral components. The substrate needs to drain effectively because some water from the pole may eventually reach the pot.
How often should the ties be checked?
Check them during regular watering. Loosen or move any tie that begins pressing into the expanding stem.
A successful DIY moss pole needs more than moss wrapped around a stick. It needs a stable anchor, breathable sphagnum, correct placement and a watering routine that treats the pole and pot as two connected but separate environments.
Position the support behind the aerial-root side of the plant. Attach only the main stem, keep the moss damp rather than saturated and provide an airy substrate below.
A well-built moss pole for Monstera can remain useful for years, especially when it is designed in sections that can be extended as the plant climbs.
The best result is not simply a taller plant. It is a climbing plant with a stable root zone, clear growing direction and support that can develop alongside it.